
Learning how to set up a guitar properly is essential for achieving better performance, whether you are a beginner or an experienced player. A well-set-up guitar not only feels comfortable to play but also produces the best possible sound. Understanding the basics of guitar setup can significantly enhance your playing experience and prolong the life of your instrument.
The first step in learning guitar setup is understanding the key components that affect playability and tone. These include string height (action), neck relief, intonation, and pickup height (for electric guitars). Each element plays a crucial role in how the guitar responds when played.
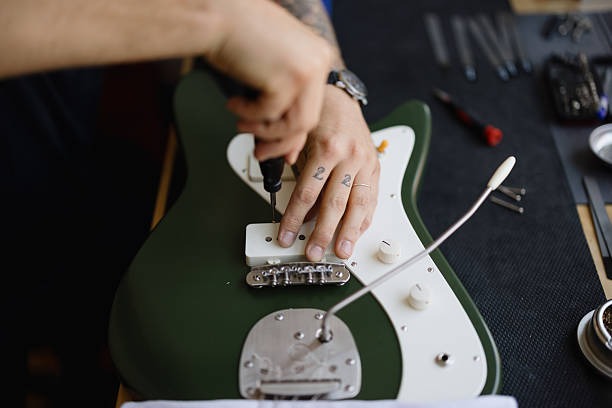
String height refers to the distance between the strings and the fretboard. If this distance is too high, pressing down on strings becomes difficult, leading to finger fatigue and slower playing. Conversely, if it’s too low, strings may buzz against frets, creating unwanted noise. Adjusting string height usually involves raising or lowering the bridge saddles on electric guitars or adjusting the saddle on acoustic guitars.
Neck relief involves adjusting the curvature of the neck using a truss rod-a metal rod embedded inside most online guitar setup course necks designed for this purpose. Proper neck relief allows enough space for string vibration without causing fret buzz while maintaining comfortable action. Learning how to safely adjust your truss rod requires patience and care; small turns can make significant differences.
Intonation ensures that notes played higher up on the fretboard remain in tune with open strings. Poor intonation causes chords and melodies to sound out of tune despite tuning open strings correctly. To fix intonation problems, you adjust each string’s saddle position forward or backward until notes at specific frets match their intended pitch accurately.
For electric guitars equipped with pickups, setting pickup height affects tonal balance and output volume from each string. Closer pickups produce stronger signals but may induce unwanted magnetic interference or distortion; farther pickups yield cleaner tones but lower output levels.
Before making any adjustments yourself, it’s helpful to gather essential tools such as a tuner (preferably digital), screwdriver set suitable for your guitar’s hardware screws, feeler gauges for measuring action gaps precisely, and possibly an electronic gauge for more advanced setups.
Begin by tuning your guitar accurately since all subsequent adjustments depend on proper tuning reference points. Then check each aspect-neck relief first by sighting along its length or using feeler gauges between frets; next measure action at various fret positions; finally test intonation by comparing open-string pitches with fretted notes around 12th fret using a tuner.
If unsure about performing these tasks alone initially consider watching tutorial videos from reputable sources online or consulting experienced players who can guide you through procedures safely without damaging delicate parts like truss rods or bridges.
Regular maintenance after initial setup keeps your instrument performing optimally under varying environmental conditions such as humidity changes which might cause wood expansion affecting neck shape over time requiring periodic readjustments.